



A travel bottle can look clean while soap remains around the lid, nozzle, valve, threads, or seams. The safest general routine is simple: check the manufacturer’s care instructions first, use a compatible cleaner sparingly, separate only the parts the product allows you to remove, scrub every accessible surface, rinse until no visible film or detergent smell remains, and dry the bottle and bowl completely before storage.
This routine applies to portable pet water bottles, built-in drinking cups, travel bowls, collapsible bowls, and silicone accessories. The exact cleaner, temperature, dishwasher setting, and disassembly method depend on the product. The CDC guidance on cleaning pet supplies advises following the item’s instructions, cleaning compatible hard pet items with soapy water, scrubbing, rinsing, and air drying.
The aim is to force every accessory through the same process. A bottle with a simple screw lid needs a different inspection from a bottle with a one-way valve. A collapsible silicone bowl needs attention at its folds and rim. A travel bowl attached to a bottle may need to be cleaned as a separate water-contact surface.
What is the safest way to clean a pet travel water bottle and bowl?
The safest repeatable routine has eight parts:
- Read the product care instructions and identify the materials, removable parts, dishwasher directions, and temperature limits.
- Empty the bottle or bowl and rinse away loose water, food, dirt, or debris.
- Separate permitted parts, such as a detachable bowl, lid, seal, or drinking cup.
- Wash the bottle, lid, nozzle, valve, seals, threads, folds, and bowl with a compatible cleaner used sparingly.
- Use a soft sponge or a suitable narrow brush to reach openings, channels, corners, and seams.
- Rinse every cleaned surface and internal channel until visible cleaner is gone.
- Check for film, bubbles, detergent smell, unusual taste, cloudy water, trapped moisture, or remaining debris.
- Leave every part open and exposed to air until fully dry, then store it in a clean, dry place.
There is no universal number of rinses that guarantees complete removal of detergent from every bottle or bowl. Rinse count depends on the amount of cleaner used, the shape of the accessory, the number of channels, and how easily water can flow through the component. A better standard is to inspect the cleaned item and continue rinsing whenever the result is uncertain.
This residue audit is useful because the easiest-to-see surface is often the least troublesome one. The bottle wall may look spotless while the lid retains a thin layer of cleaner. A valve may hold water in a small channel. A collapsible bowl may look dry on the outside while moisture remains in a fold.

Prepare the cleaner, tools, and care instructions
Start with the manufacturer’s instructions before choosing a cleaner, brush, temperature, or dishwasher cycle. Product construction varies enough that a general cleaning method cannot answer every material question.
Look for instructions covering:
- Approved cleaners or detergents.
- Whether hand washing is required.
- Whether the bottle or bowl is dishwasher-safe.
- Which rack to use.
- Whether the lid, valve, seal, strap, or bowl may be removed.
- Whether hot water, soaking, boiling, or chemical disinfection is allowed.
- Whether the item should be dried open, separated, or assembled.
If the instructions are missing, check the product packaging, care card, manufacturer support page, or product listing. If the material, coating, seal, or valve is unknown, use a cautious hand-washing routine with a small amount of a compatible mild cleaner and avoid heat or chemical treatment that the product does not expressly allow.
What is the best soap for cleaning a pet travel bottle?
The best cleaner is the mild cleaner that the manufacturer permits for that accessory. For compatible hard pet items, the CDC describes cleaning with soap or detergent and warm water, followed by scrubbing, rinsing, and air drying. The guidance does not establish one universal dish soap, detergent concentration, or water temperature for every bottle, valve, seal, coating, or flexible bowl.
Use the smallest practical amount of cleaner. More soap does not automatically mean a cleaner result. Excess detergent can create more work at the rinse stage, especially in a narrow nozzle or valve channel. A small amount spread across a wet sponge or brush is often easier to control than pouring a large quantity directly into the accessory.
Avoid choosing a cleaner because it is popular as a household substitute. Vinegar, essential oils, baking soda, bleach, disinfectant sprays, and cleaning tablets should not be treated as universal solutions. The CDC states that available research is insufficient to treat vinegar as a general substitute for cleaning or disinfection of pet items. The same caution applies to other household products unless the accessory instructions and the product label support their use.
Routine cleaning and disinfection are separate tasks. Cleaning removes dirt, residue, and soapy water. Disinfection is a further step used for particular situations, such as illness, contact with faeces or urine, or a household with elevated infection concerns. A disinfectant must be compatible with the accessory and used exactly as its label directs. It should never be added casually to a routine intended only to remove soap or ordinary travel dirt.
If the accessory is used by a cat and disinfection becomes necessary, read the ingredient list carefully. The CDC warns that phenols are very toxic to cats and advises avoiding disinfectants containing phenol for cats. This warning concerns disinfectants; it does not mean that every ordinary dish soap is unsafe, nor does it replace the product label.
Which tools help without damaging the accessory?
Gather only tools that fit the accessory and its care instructions:
- A clean soft sponge or cloth for broad surfaces.
- A soft-compatible narrow brush for openings, threads, corners, and channels.
- A clean towel for wiping accessible exterior surfaces.
- A drying rack or clean area where the parts can remain open.
- A small container for keeping removable parts together during washing.
The brush should be narrow enough to reach the part but never forced into it. A stiff brush, metal pick, knife, or abrasive pad can scratch plastic, roughen silicone, damage a seal, or widen a valve opening. Scratches and damaged edges make later cleaning harder.
A narrow brush can be useful for hidden areas, but evidence for a particular brush size or material does not transfer automatically from one pet accessory to another. For example, a manufacturer cleaning set may include a thin brush for corners and tight parts in water-fountain equipment, but that does not prove that the same brush is safe for every travel bottle valve or silicone seal. Use the tool as a shape-matching aid, not as a universal recommendation.
Before washing, inspect the accessory under good light. Identify every place that touched water, saliva, food, or the cleaner:
- Bottle opening and interior shoulder.
- Lid threads.
- Underside of the lid.
- Nozzle opening.
- Valve channel or drinking spout.
- Rubber or silicone seal.
- Locking button or slider.
- Hinge and attachment point.
- Fold lines and seams.
- Bowl rim and base.
- Any food capsule or separate compartment.
This inspection changes the task from “wash the bottle” to “wash each water-contact surface.”
How do you clean the bottle, lid, nozzle, and valve?
Clean each accessible part separately. Empty the bottle first, remove loose debris, and rinse the inside with clean water. If the product has a detachable bowl or cup, separate it if the manufacturer permits this. A product such as the Kurgo Gourd Water Bottle & Bowl is specifically described by its manufacturer as having a detachable bowl, which means its bottle and bowl can be handled as separate surfaces during cleaning. That construction should not be assumed for another product. Kurgo’s Gourd Water Bottle and Bowl details support that named product-specific example.
1. Wash the bottle interior
Add a small amount of compatible cleaner to the bottle with warm water if the care instructions allow warm water. Close the bottle only if doing so helps the cleaning solution contact the lid or internal mechanism and the product instructions permit it. Otherwise, wash the bottle and lid separately.
Agitate the solution by gently rotating or shaking the bottle. This can loosen residue on broad interior walls, but it does not replace brushing. A bottle with a shoulder, narrow neck, internal tube, or one-way valve may have surfaces that the liquid does not scrub effectively.
Use a soft sponge or bottle brush only if its shape and material suit the product. Pay attention to:
- The base, where settled water or particles may remain.
- The shoulder below the opening.
- The inner lip of the bottle.
- Any internal groove or ridge.
- The area beneath a removable insert.
- The channel leading to a nozzle.
Avoid leaving cleaner in the bottle longer than the care instructions recommend. Soaking may help some products, but it may damage or swell seals, affect adhesives, or leave more solution in channels that are difficult to rinse.
2. Wash the lid and threads
The lid often needs more attention than the bottle body. Turn it over and examine the underside. Wash the threads, grooves, gasket seat, locking mechanism, and the area where water gathers after the bottle is tipped.
Run a soft brush around the threads rather than across them with force. Work around the entire circumference. If the lid contains a seal that the manufacturer allows you to remove, lift it gently and clean both the seal and the groove beneath it. Do not pry at a fixed seal with a sharp object.
A lid may still smell of detergent after the bottle itself has no smell. That usually means the cleaner reached a groove, seal, or underside surface that received less rinse water. Direct clean water over those areas and rotate the lid so the water reaches each side.
3. Clean the nozzle or drinking opening
The nozzle is a high-priority area because it may trap cleaner, saliva, dust, or old water. Flush it with clean water from more than one direction if the construction allows it. Open or activate the drinking mechanism according to the product instructions while rinsing.
Do not use force to push a brush through a narrow opening. If a brush cannot pass safely, use repeated flushing and a soft cloth around the accessible edge. If the nozzle can be removed, remove it only according to the manufacturer’s instructions. If it cannot be removed, treat the visible opening and the internal passage as separate rinse targets.
Watch for:
- Bubbles that reappear after the surface initially looks clear.
- A slick feeling around the opening.
- A detergent smell when the nozzle is held close.
- Cloudy water emerging from the channel.
- Slow or uneven flow.
- A valve that sticks or does not return to its normal position.
These signs do not identify a specific cause by themselves. They tell you to stop treating the accessory as ready for use and inspect the mechanism again.
4. Clean the valve and seal
A valve is a small flow-control part that opens, closes, or regulates water movement. It may contain a flexible slit, silicone flap, spring, channel, or seated seal. Its cleaning access differs widely between products.
If the manufacturer provides a removal method, follow it carefully and keep track of the order of parts. Wash the accessible valve surfaces with the compatible cleaner and a soft tool. Rinse from the side that normally contacts drinking water, then rinse from the opposite direction if the construction allows it.
If the valve cannot be removed, do not improvise with a pin, needle, knife, or forceful twisting. Flush the channel with clean water, open the mechanism as intended, and repeat the rinse while checking what comes out. If residue remains trapped and the product gives no safe way to reach it, contact the manufacturer or stop using the accessory for drinking water.
A component that cannot be inspected or rinsed adequately may be unsuitable for a routine that depends on complete access. That is a construction problem, not a sign that the cleaner should be made stronger.
5. Rinse before moving to the bowl
After washing the bottle and its lid, rinse each part separately. Water should reach the bottle opening, threads, nozzle, valve, seal, and any exposed channel. Turn parts in your hand so water does not follow only one path.
Do not rely on a bottle being “full of clean water” as proof that its lid or valve has been rinsed. The water may bypass a groove or remain outside the channel that held the cleaner. Rinsing must be directed at the places where cleaner was applied.
For a more detailed explanation of hidden water-contact surfaces, residue inspection, and complete drying, see this guide to pet fountain hygiene and hidden water channels. The equipment differs, but the inspection principle is useful: visible cleanliness does not remove the need to check seams, chambers, and passages.

How should you clean a collapsible or silicone pet bowl?
Clean a collapsible or silicone pet bowl by opening every fold, washing the rim and underside, rinsing the creases, and drying it while fully expanded. The manufacturer’s care instructions take priority because “silicone bowl” describes a material category, not one universal construction or temperature limit.
Open the bowl completely. Press out the base and separate the folds as far as the product allows. Wash the inside first, then the rim, outer wall, base, underside, and any raised edge that contacts the ground or a travel surface.
Focus on folds and seams
Folds can collect food particles, dirt, cleaner, and water. Use your fingers or a soft sponge to open each fold. If the manufacturer permits a brush, use one that will not cut or roughen the surface.
Run clean water through every fold while changing the angle of the bowl. A single rinse under a tap may clean the flat center while leaving cleaner at the crease. Expand the bowl, collapse it partway, and open it again during rinsing so the water reaches the moving surfaces.
Inspect the rim closely. A raised lip may hold a narrow strip of cleaner. A bowl that feels slippery after rinsing needs more water and another inspection.
Silicone does not create a universal care rule
Some manufacturers describe specific silicone travel bowls as collapsible, non-porous, and top-rack dishwasher-safe. Petmate gives those instructions for its Bamboo Silicone Travel Bowls. That product-specific statement does not establish that every silicone bowl can tolerate the same dishwasher heat, rack position, detergent, or drying cycle. See the Petmate Bamboo Silicone Travel Bowls care information for that named example.
The same principle applies to polypropylene, PVC-free plastics, rubber-like seals, coated surfaces, and mixed-material accessories. A material name can help identify the product, but the care label controls the cleaning method.
If the bowl has a fabric sleeve, bamboo-fibre element, metal frame, adhesive base, or separate insert, treat each component according to its own care instructions. Do not assume that the flexible bowl and attached frame share the same heat or cleaner limits.
Rinse the bowl by sight and touch
After washing, hold the bowl under clean running water and turn it slowly. Look for:
- White or cloudy streaks.
- Bubbles that gather in the folds.
- A slick feel along the rim.
- A persistent soap smell.
- Water beading differently on one section.
- Particles caught under a raised edge.
These checks are practical observations, not laboratory proof that every molecule of detergent has been removed. They are useful for deciding whether the bowl needs another rinse. If uncertainty remains, rinse again rather than guessing.
A bowl used for wet food deserves a more careful wash than one used only for a brief drink of clean water. A 2023 study of household dog food bowls examined bowl material, food type, cleaning method, and microbiological contamination in a specific study context. The study involved 96 dog food bowls and should not be treated as evidence about every portable bowl, but it reinforces a practical point: the item’s use and material affect the cleaning question. The peer-reviewed study of dog bowl contamination supports that bounded interpretation.
Which cleaning method fits your accessory?
Hand washing is the best default when the care instructions are unclear, the accessory contains a valve or seal, or the product is not labelled dishwasher-safe. A dishwasher, cleaning tablet, or household alternative may suit some products, but each requires product-specific permission.
| Method | Best fit | Main benefit | Main caution |
|---|---|---|---|
| Hand washing | Most accessories, especially when construction is unclear | Gives direct control over each surface and rinse path | Requires careful attention to valves, folds, and threads |
| Soft sponge or cloth | Broad bottle walls, bowl surfaces, lids, and rims | Gentle contact over larger areas | May not reach narrow channels |
| Soft-compatible narrow brush | Threads, corners, openings, and accessible channels | Improves access to tight areas | Can damage seals, coatings, or soft surfaces if forced |
| Dishwasher | Only products and components labelled dishwasher-safe | Provides a convenient full cycle | Rack position, temperature, and removable-part limits vary |
| Cleaning tablet | Only when the product or tablet instructions support its use | May be useful for a compatible interior | Can leave residue in valves or channels and is not universal |
| Vinegar or household mixture | Only where a product-specific instruction expressly allows it | May be suggested for some household tasks | Not supported here as a universal pet-accessory cleaner or disinfectant |
| Disinfectant | Specific illness or contamination situations when the item and label permit it | Adds a separate disinfection step | Requires exact label use, compatibility, rinsing, and cat-safety checks |
The table is a decision aid, not a ranking. Hand washing may take longer, yet it lets you see whether water reaches the surfaces that matter. A dishwasher may be appropriate for a labelled product, but it does not automatically prove that every seal, valve, strap, or lid insert received the same treatment.
For product examples, manufacturer instructions vary. Highwave lists its 20-ounce AutoDogMug as BPA-free polypropylene and states that it may be top-rack dishwasher-washed or hand-washed. That applies to the named product, not to every polypropylene bottle. See the Highwave AutoDogMug product-care information for the named example.
Before choosing a dishwasher, confirm all of the following:
- The whole accessory is labelled dishwasher-safe, or each component you plan to wash is covered by the instructions.
- The stated rack position is followed.
- Removable valves, seals, lids, and straps are included in the dishwasher direction.
- The product does not require a lower temperature or a particular drying method.
- The parts can be removed from the dishwasher and opened for complete drying.
If any part of this list is unclear, hand washing is the more controllable choice.

How do you know whether the bottle or bowl is rinsed properly?
You know the accessory is ready for drying when visible cleaner is gone, the water leaving the openings looks clear, no persistent detergent smell remains, and the surfaces do not feel unusually slick. These checks help with practical decisions, but they cannot prove laboratory-level removal of all residue.
Use the following sequence:
- Inspect broad surfaces. Look at the bottle wall, bowl center, lid, rim, and base under good light.
- Inspect narrow surfaces. Check threads, nozzle openings, valve edges, seals, seams, and folds.
- Flush channels. Run clean water through every accessible passage and operate the mechanism as the instructions allow.
- Check the rinse water. Look for cloudiness, bubbles, particles, or unusual colour.
- Check the smell. A persistent detergent smell means the item needs more rinsing or further inspection.
- Check the feel. A slick or slippery surface may indicate remaining cleaner, though surface feel can also vary by material.
- Repeat when uncertain. There is no fixed rinse number that applies to all designs.
Do not taste the accessory yourself to test it. If a pet has already rejected water from the bottle because it tastes or smells unusual, stop using it for drinking water, rinse it thoroughly, and inspect the lid, nozzle, valve, and seal.
A clean-looking bottle can still produce cloudy water if residue is held in a hidden channel. Open the parts as far as permitted and rinse the channel directly. If the accessory cannot be opened, flushed, or inspected well enough to remove persistent residue, contact the manufacturer. Continued use with an inaccessible contamination or detergent problem is a reason to replace the accessory or choose a design with better cleaning access.
Residue-check decision aid
Use this simple decision path after washing:
- No film, no detergent smell, clear rinse water, and every accessible part inspected: dry the accessory open.
- Film, bubbles, detergent smell, cloudy rinse water, or an overlooked fold or channel: rinse the affected part again, then inspect it.
- Residue remains after repeated compatible cleaning and rinsing: stop using it for drinking water and check the manufacturer’s instructions or support service.
- A seal, valve, or surface is cracked, swollen, sticky, warped, or damaged: stop relying on the routine until the part is replaced or the accessory is retired.
The purpose of the check is to make the next action clear. It is not a certification that the accessory is free of every possible contaminant.

How should you dry and store a pet travel bottle or bowl?
Dry the bottle, lid, valve, seals, and bowl completely before closing, packing, or storing them. Separate or open the parts as the product allows, place them where air can reach the interior and folds, and check the hidden areas before reassembly.
The CDC advises air drying cleaned pet items or wiping them with a clean towel. Separate CDC Giardia prevention guidance on thorough rinsing and drying also stresses thorough rinsing and complete drying in relevant infection-control situations.
A practical drying routine looks like this:
- Shake excess water from the bottle and lid.
- Leave the bottle uncapped or open.
- Place the lid so air can reach its underside.
- Open collapsible bowl folds.
- Turn seals or removable inserts so both sides can dry, if the instructions allow this.
- Stand the bottle where it cannot collect dirty water from a sink or counter.
- Use a clean towel only on surfaces the towel can reach without pushing moisture into a valve or seam.
- Inspect the interior, threads, folds, and valve area before storage.
Do not seal a damp accessory inside a bag or travel compartment. The outside may feel dry while water remains under a seal or inside a channel. A closed lid can also prevent air from reaching the bottle neck.
There is no universal drying time because accessory shape, humidity, airflow, material, and part separation vary. Use dryness by inspection as the standard. If the product instructions specify a particular drying position, follow them.
Store the clean accessory in a dry place away from litter dust, food crumbs, cleaning chemicals, and damp travel gear. If the bottle or bowl is stored in a pouch, allow the pouch to dry and clean it according to its own care instructions.
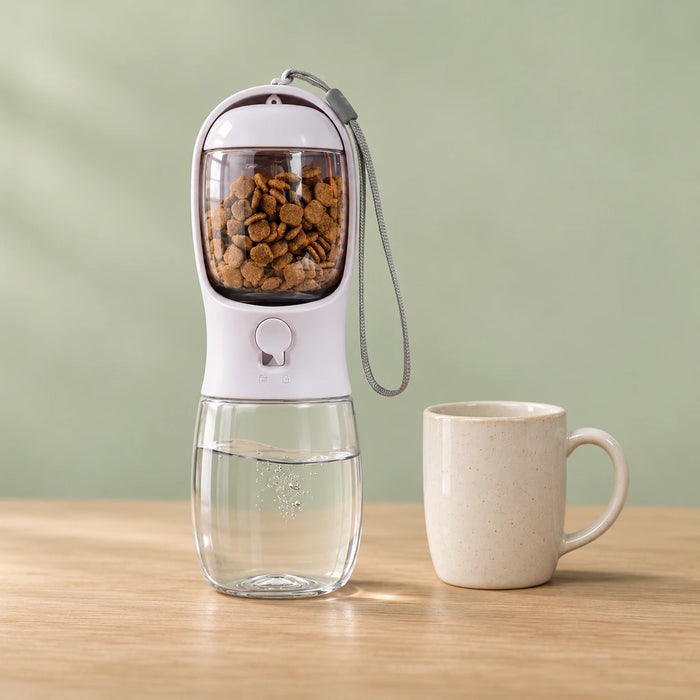
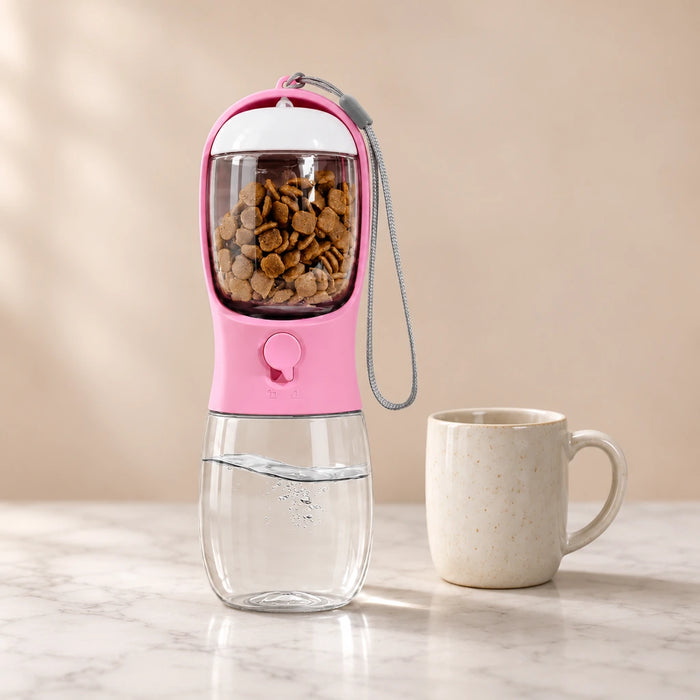
For a specific example of a travel bottle care routine, the Aqua-Feast Travel Water Bottle & Food Capsule product information advises hand washing after outings, rinsing the drinking area, checking the lock and seal, and drying the bottle open before storage. Those directions illustrate the same principle: construction details determine what must be inspected and how the item should be left between uses. See the Aqua-Feast travel bottle care details for the product-specific instructions.
What should you do about soap smell, taste, film, or cloudy water?
Stop using the accessory for drinking water, separate the permitted parts, rinse the affected areas with clean water, wash again using the compatible method, and inspect the accessory before reuse. Persistent residue is a reason to pause, not a reason to add a stronger cleaner.
If the bottle smells of detergent
Rinse the bottle, lid, nozzle, valve, and seal separately. Focus on grooves and channels. Run clean water through the nozzle while operating the mechanism as intended. Leave the accessory open to dry, then check the smell again.
If the smell remains after repeated compatible cleaning and thorough rinsing, check whether the material has absorbed an odour, whether the accessory has been exposed to another product, or whether a seal or valve is damaged. Follow the manufacturer’s advice before trying another cleaner.
If water tastes soapy
Do not add vinegar, bleach, perfume, essential oils, or another chemical to cover the taste. Flush the water-contact parts with clean water and wash again with a small amount of compatible cleaner. Rinse until the taste concern is gone according to practical inspection, then allow the accessory to dry fully.
If the taste persists, stop using the item for drinking water. A damaged seal, porous attachment, trapped residue, or incompatible cleaner may be involved.
If you see a cloudy film
Cloudiness may come from cleaner, mineral deposits, food residue, material wear, or water quality. The appearance alone does not identify the cause. Wash the surface using the product-approved method, rinse it, and compare the result after drying.
Inspect areas where cloudiness gathers: the underside of the lid, threads, valve seat, bowl folds, and seams. If the surface has become rough, sticky, cracked, or permanently stained, check the manufacturer’s care information or replace the affected part.
If the valve cannot be reached
Do not force it open with a sharp tool. Flush the valve from the accessible direction, operate it normally during rinsing, and check whether the product instructions describe safe removal. If the channel cannot be cleaned or inspected and residue remains, stop using the accessory for drinking water.
A travel bottle should be practical to clean throughout its service life. If its design makes the water-contact mechanism inaccessible, that limitation matters as much as capacity or portability when choosing a replacement.
If the material looks damaged
Stop using the affected accessory if you see cracks, splits, peeling, swelling, warping, sticky surfaces, loose seals, or a valve that no longer closes correctly. Cleaning cannot restore damaged material. Contact the manufacturer for a replacement part when available, or retire the accessory if its condition could affect safe use.
How often should you clean a pet travel bottle or bowl?
Clean travel accessories after use when practical, then adjust the routine to what the item held, how long it stayed wet or dirty, and the product’s care instructions. A practical baseline from CDC guidance is daily cleaning for pet water bowls, with more frequent cleaning when an item is visibly dirty or smells bad. That example does not create one fixed interval for every travel bottle, valve, or bowl.
Clean promptly when the accessory has held:
- Food or treats.
- Milk or another liquid that can leave residue.
- Muddy or visibly contaminated water.
- Water that has remained inside for an extended period.
- Water after a pet has been unwell.
- Water after contact with faeces, urine, or a dirty ground surface.
A short walk with clean water may call for a straightforward wash and complete drying. A long hike, hot day, boarding stay, road trip, or muddy outing may justify a closer inspection of the lid, valve, bowl folds, and travel pouch.
If a dog or cat is ill, ask a veterinarian or public-health professional whether additional cleaning or disinfection is appropriate for the situation. CDC guidance includes more intensive cleaning and disinfection for certain illness-related circumstances, including daily cleaning and disinfection of items used by dogs or cats taking medication for Giardia during the relevant illness-management period. That illness-specific guidance should not be applied automatically to every healthy pet’s travel bottle.
The water itself also matters. A clean bottle cannot make unsafe water safe to drink. During travel, avoid potentially contaminated natural water sources unless the water has been made safe according to applicable public-health guidance. The bottle’s cleanliness and the water’s safety are separate questions.
For broader travel preparation, including portable hydration planning and outing supplies, see this pet hydration guide for walks and trips. Cleaning is one part of a travel routine; choosing, filling, carrying, and storing the accessory also affect the day’s results.
Frequently Asked Questions
Can I use ordinary dish soap to clean a pet water bottle?
You may use ordinary dish soap only when it is compatible with the accessory and its care instructions do not require another method. Use a small amount, wash each water-contact surface, and rinse thoroughly. The evidence does not support one universal dish soap, concentration, or temperature for every travel bottle and bowl.
How many times should I rinse a pet water bottle properly?
There is no fixed number of rinses that guarantees complete detergent removal from every design. Rinse until visible cleaner is gone, the rinse water looks clear, no persistent detergent smell remains, and the lid, nozzle, valve, seal, threads, folds, and seams have been inspected as far as the product allows. Continue rinsing when any concern remains.
Can I put a pet travel bowl in the dishwasher?
Only if the bowl or its components are labelled dishwasher-safe. Follow the specified rack position and temperature limits. A dishwasher-safe label for one silicone, polypropylene, or collapsible product does not establish that every product made from the same material is dishwasher-safe.
What if the bottle lid or valve cannot be removed?
Do not force it or use a sharp tool. Flush the accessible channel with clean water, operate the mechanism as intended, and check the manufacturer’s instructions for a safe cleaning method. If residue remains in a part that cannot be reached, inspected, or rinsed, stop using the accessory for drinking water and contact the manufacturer.
Should I disinfect a travel bottle after every trip?
Routine cleaning is generally the appropriate starting point for ordinary use. Disinfection is an additional step for certain situations, such as illness or contact with faeces or urine, and it must be compatible with the accessory and used according to the disinfectant label. For cats, avoid disinfectants containing phenols unless qualified guidance and the label specifically support safe use.

A compact routine to repeat before the next trip
Use this short version when you already know the product’s care instructions:
- Empty the bottle or bowl.
- Check the label for cleaner, heat, dishwasher, and disassembly limits.
- Separate permitted parts.
- Wash the bottle, lid, nozzle, valve, seal, threads, bowl, folds, and seams with a compatible cleaner used sparingly.
- Flush narrow openings and operate accessible valves during rinsing.
- Rinse every part until no visible film, persistent bubbles, or detergent smell remains.
- Inspect for cloudy water, slick surfaces, trapped residue, or material damage.
- Leave the bottle open and the bowl expanded until fully dry.
- Reassemble only after the parts are dry.
- Inspect the accessory again before filling it for the next outing.
A clean accessory is one that has been washed according to its care instructions, rinsed with attention to hidden surfaces, dried completely, and checked before use. Before the next walk, hike, drive, or boarding stay, inspect the lid, nozzle, valve, folds, seams, and seals once more. If the material, construction, cleaner, or care direction remains uncertain, follow the manufacturer’s instructions or choose an accessory with clearer cleaning access. Readers comparing material selection, construction, and product-care priorities can also review Viva Essence’s approach to pet accessories and product care.
For a portable option with product-specific hand-washing, rinsing, lock, seal, and open-drying directions, review the Aqua-Feast Travel Water Bottle and Food Capsule after completing the cleaning checklist above. The useful choice is the accessory whose materials, parts, and care instructions you can understand and follow consistently.